
With a green screen, you can create virtually any background you like whilst filming. You’ve no doubt seen that weather presenter forecasting the weather whilst pointing at the globe. But this technique is also widely used in corporate films and television programmes. How exactly does a green screen work? Why is the screen green? And how can you use a green screen yourself? We’ll explain it all to you.
What is a green screen?
The name says it all: a green screen is, quite simply, a green screen. It is a green background intended to be replaced later. For example, it could be a large piece of fabric, a wall or a specialised screen. During filming, the person (or object) stands in front of that green screen. Later, you can remove this green colour from the image and replace it with a different background. For example, with a photograph or a digital backdrop. In fact, you can even replace it with an entire video.
Why is a green screen green?
But why do we actually use green? Why not brown, black or white? It’s all down to contrast. Green is virtually absent from human skin tones. This allows the software to clearly distinguish between the person and the background.
But you’re not limited to green. You can also use a blue screen. Yes, a blue screen. Which colour you choose depends, amongst other things, on the clothing and the subjects you’re filming. For example, is someone wearing a green suit? In that case, a blue background might be a better choice.
How does a green screen work in practice?
A green screenworks using chroma keying. That sounds more complicated than it is, because it’s really nothing more than recognising a specific colour in theimage. This is done by special software that makes all pixels of that specific colour (usually green) transparent. You can then display a different video or image in those transparent areas.
The most important thing is that the software can clearly distinguish between the background and the person standing in front of it. That’s why an even green colour and good lighting are essential. Have you ever noticed that weather presenters never wear anything green? They do that for a reason. Just imagine if those green trousers were filtered out. Then they’d be standing there with no trousers on!
What equipment do you need for a green screen shoot?
Are you planning to do a green screen shoot yourself? Then you’ll definitely need a green background. And, of course, a camera, lighting, tripods and microphones. But perhaps most important of all is editing software such as Adobe Premiere Pro, DaVinci Resolve or CapCut. This is what you’ll use after filming to remove the green background and add something new.
How do you use a green screen for webinars and videos?
A green screen is no longer just for the weather presenter or an action-packed film. You can also make good use of the green background for corporate videos and online events. For example, for a webinar about a new product, where you can show the product in a different setting. You can also create a virtual studio that perfectly matches your organisation’s corporate identity. The same applies to a corporate video. You don’t necessarily have to film at different locations if you can simply change the background instead.
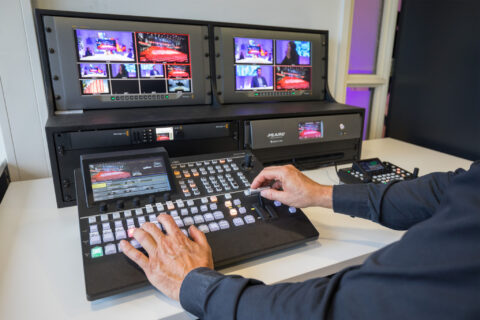
A green screen can also be very useful for live streams. During the broadcast, the green background is replaced. Please note: you’ll need software or production equipment that can do this for you in real time.
Would you like to know more about recording professional videos? Then read our articles on ‘Making a video podcast: how does it work? ’ and ‘Live-streaming hybrid events’.
How do you edit a green screen recording?
How you edit a green screen recording depends on the software you use. You can do this using Adobe Premiere Pro, DaVinci Resolve or CapCut, for example. You import the video, add a background and remove the green. You then need to refine the details. Pay close attention to the finishing touches around hair or edges, as a green glow can sometimes remain visible there.
How well the editing turns out also depends on the quality of your footage. Lighting, in particular, plays a major role here. For example, if your screen is full of shadows, the software will struggle more with that.
Common mistakes when filming with a green screen
Anyone can use a green screen. But not everyone does it properly. There are certain things that often go wrong, and you can see that on screen. So make sure you avoid the following mistakes.
- Poor lighting
Avoid shadows or dark patches on your screen. This makes it harder for the software to remove the green. So make sure you have the right lighting. - Standing too close to the screen
Sometimes a speaker stands too close to the screen. No matter how good the lighting is, you’ll still get shadows. The green light may also reflect slightly off the speaker’s clothing or skin. So make sure they’re standing at the correct distance from the screen. It’s a good idea to do a test recording first, before you start the full production. - Someone is wearing green clothes
We mentioned this briefly with the weather presenter: green clothes and a green screen aren’t a good combination. That’s because the software can also make parts of the clothes transparent. It does make for a funny result, but it’s not something you’d want. - The new background doesn’t match the shot
If the speaker is standing in bright studio lighting but you place them in front of a dark background, it will look unnatural. So pay close attention to colours and lighting. The same rule applies here: do a test recording. - The green screen has creases
A screen with creases causes shadows and colour variations. Fortunately, this is easy to fix by pulling the screen taut and ensuring there are no creases in it.
Record a professional video at Jaarbeurs Studio
Do you want to create a professional video, presentation or live stream? Then there’s a lot of equipment to think about. Not just the green screen, of course – you’ll also need high-quality cameras, microphones and lighting, for example. Let us take care of this for you.
Jaarbeurs Studio in Utrecht is the place to go for all sorts of productions, such as webinars, TV recordings and talk shows. Our studio is equipped with, amongst other things, four 4K cameras, microphones and high-quality lighting. What’s more, you can choose from various settings, such as a talk show desk or a lounge area. And you don’t have to do any of this on your own. Our experienced technicians will help you with the recording and are on hand to support you throughout the entire production.
Are you unsure whether it’s better to produce your broadcast from the office or in a studio? Then have a read of our article: Livestream from the office or a studio?